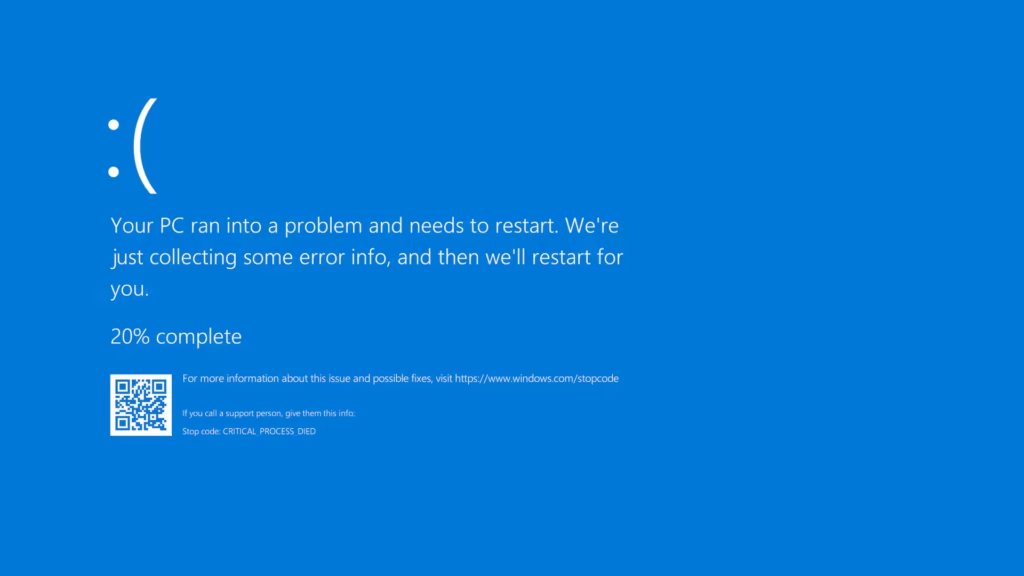
Understanding the Blue Screen of Death (BSOD): A Step-by-Step Guide

Hey there, Windows users! We all know that the Blue Screen of Death (BSOD) can be a pretty alarming sight, right? It pops up when your system runs into a hiccup it can’t fix on its own, and that can lead to a shutdown or a restart. But don’t worry! In this blog, we’re going to explore what causes it and how you can tackle the issue. We’ll walk you through each step, with some handy visuals to make it all clear and simple!
Step 1: What is the Blue Screen of Death?
The BSOD is a safety mechanism in Windows that prevents further damage to your system when a critical error occurs. It displays a blue screen with a sad face emoji (in newer Windows versions) and an error message or code. This screen indicates that something has gone wrong with your hardware, software, or drivers.
Step 2: Common Causes of the BSOD
The BSOD can be triggered by a variety of issues. Here are some of the most common causes:
Hardware Issues: Faulty RAM, hard drive failures, or overheating components. Driver Problems: Outdated, corrupted, or incompatible drivers. Software Conflicts: Incompatible programs or corrupted system files. Malware: Viruses or malicious software causing system instability. Windows Updates: Failed updates or incompatible patches.
Step 3: Understanding the Error Code
When the BSOD appears, it usually includes an error code or message. This code is your first clue to diagnosing the problem. Some common error codes include:
- CRITICAL_PROCESS_DIED: Indicates a critical system process has failed.
- MEMORY_MANAGEMENT: Suggests a problem with your RAM.
- DRIVER_IRQL_NOT_LESS_OR_EQUAL: Points to a driver issue.
- SYSTEM_THREAD_EXCEPTION_NOT_HANDLED: Often related to hardware or driver problems.
Step 4: How to Troubleshoot the BSOD
Here’s a step-by-step guide to fixing the BSOD:
1. Restart Your Computer
- Sometimes, the BSOD is a one-time glitch. Restart your system and see if the problem persists.
2. Check for Hardware Issues
- Ensure all hardware components (RAM, hard drive, etc.) are properly connected.
- Run a hardware diagnostic tool to check for failures.
3. Update or Roll Back Drivers
- Go to Device Manager and check for outdated or problematic drivers.
- Update drivers from the manufacturer’s website or roll back to a previous version.
4. Scan for Malware
- Use a trusted antivirus program to scan for and remove any malware.
5. Run System File Checker (SFC)
- Open Command Prompt as Administrator and type sfc /scannow to repair corrupted system files.
6. Uninstall Recent Updates
- If the BSOD started after a Windows update, uninstall the update by going to Settings > Update & Security > Windows Update > View update history > Uninstall updates.
7. Perform a System Restore
- If the issue persists, restore your system to a previous state using System Restore.
Step 5: Preventing Future BSOD
To avoid encountering the BSOD in the future, follow these best practices:
- Keep Your System Updated: Regularly install Windows updates and driver updates.
- Use Reliable Software: Avoid installing untrusted programs or drivers.
- Monitor Hardware Health: Check your system’s temperature and hardware performance regularly.
- Backup Your Data: Always keep a backup of important files to avoid data loss.
Step 6: When to Seek Professional Help
- If you’ve tried all the troubleshooting steps and the BSOD still occurs, it may be time to consult a professional. Persistent BSODs could indicate a serious hardware or software issue that requires expert attention.
Conclusion
The Blue Screen of Death can be intimidating, but understanding its causes and solutions can help you tackle it effectively. By following the steps outlined above, you can diagnose and fix the issue, ensuring your system runs smoothly. Remember, prevention is key—keep your system updated and maintain good hardware health to avoid future BSODs.