
The Beginner’s Guide to Linux for System Administrators

Aspiring system administrators who are new to Linux or seeking a structured guide to mastering its core concepts. Each chapter builds foundational knowledge and practical skills to manage Linux systems effectively in professional environments.
Chapter 1: Introduction to Linux for System Administrators
What is Linux and Why is it Essential for System Administration?
Linux is an open-source, Unix-like operating system kernel that powers a wide range of systems, from servers to embedded devices. Its flexibility, stability, and security make it a cornerstone for system administration. Linux’s open-source nature allows administrators to customize systems, troubleshoot issues at a deep level, and leverage a vast community for support. It’s widely used in enterprise environments, cloud infrastructure, and web servers due to its reliability and cost-effectiveness.
Key Benefits for System Admins:
Control: Fine-grained control over system resources and configurations.
Security: Robust permission models and frequent updates.
Scalability: Suitable for small-scale systems to large data centers.
Community and Tools: Extensive documentation and powerful tools like Bash, Ansible, and Docker.
Brief History and Evolution of Linux Distributions
Linux began in 1991 when Linus Torvalds created the Linux kernel. Combined with GNU tools, it became a full-fledged operating system. Distributions (distros) package the kernel with software, tools, and configurations tailored for specific use cases.
Major Distributions:
Red Hat Enterprise Linux (RHEL): Enterprise-focused, with strong support and stability. Used in corporate environments.
CentOS Stream: A free, community-driven distro based on RHEL, ideal for testing and development.
Ubuntu: User-friendly, widely adopted for servers and desktops, with a focus on ease of use.
Debian: Known for stability and a vast package repository, used in servers and cloud environments.
Evolution:
1990s: Early distros like Slackware and Debian emerged.
2000s: Ubuntu popularized Linux for desktops; RHEL gained enterprise traction.
2010s-Present: Cloud computing and containerization (e.g., Docker, Kubernetes) drove adoption of distros like Ubuntu Server and CentOS.
Understanding the Linux File System Hierarchy (FHS)
The File System Hierarchy Standard (FHS) defines the structure of directories in Linux:
/: Root directory, the top of the hierarchy.
/etc: Configuration files (e.g., /etc/passwd, /etc/hosts).
/home: User home directories.
/var: Variable data like logs (/var/log) and temporary files.
/bin, /sbin: Essential binaries for users and system tasks.
/usr: User utilities and applications.
/tmp: Temporary files, cleared on reboot.
/root: Home directory for the root user.
Understanding the FHS is critical for navigating and managing system files effectively.
Basic Command-Line Interface (CLI) Navigation and Essential Commands
The CLI is the primary tool for Linux system administration. Mastering basic commands is essential:
ls: Lists directory contents (ls -l for detailed view, ls -a for hidden files).
cd: Changes directories (cd /path/to/dir, cd .. to go up one level).
pwd: Prints the current working directory.
mkdir dir_name: Creates a directory.
rmdir dir_name: Removes an empty directory.
cp source dest: Copies files or directories (cp -r for recursive copy).
mv source dest: Moves or renames files/directories.
rm file: Deletes files (rm -r for directories, rm -f to force).
Practice Tip: Use man command (e.g., man ls) to access command documentation.
Introduction to Users, Groups, and Permissions
Linux is a multi-user system with robust access control:
Users: Each user has a unique username and user ID (UID). The root user has full system access.
Groups: Users can belong to groups (GID) for shared permissions.
Permissions: Files and directories have read (r), write (w), and execute (x) permissions for owner, group, and others. Example: rwxr-xr-x (owner: rwx, group: r-x, others: r-x).
Commands:
whoami: Displays the current user.
id: Shows user and group information.
chmod: Changes permissions (e.g., chmod 755 file).
chown: Changes ownership (e.g., chown user:group file).
Chapter 2: Linux Installation and Initial Configuration
Choosing the Right Linux Distribution for System Administration
Selecting a distro depends on the use case:
-
RHEL/CentOS Stream: Ideal for enterprise environments with long-term support.
-
Ubuntu Server: Beginner-friendly, with extensive documentation and cloud support.
-
Debian: Stable and lightweight, suitable for servers.
-
Considerations: Hardware compatibility, support lifecycle, package management, and community support.
Installation Methods
-
Bare Metal: Install directly on hardware using a bootable USB drive or DVD. Requires partitioning and bootloader setup (e.g., GRUB).
-
Virtual Machine: Use tools like VirtualBox or VMware for testing or isolated environments.
-
Cloud: Deploy on AWS, Azure, or GCP using pre-configured images.
Steps:
-
Download the ISO from the distro’s official website.
-
Create a bootable medium or upload to a cloud provider.
-
Follow the installer prompts to configure partitions, users, and network settings.
Post-Installation Setup
-
Network Configuration: Assign static/dynamic IP addresses using tools like nmcli or editing /etc/network/interfaces.
-
Updating Packages: Run sudo apt update && sudo apt upgrade (Ubuntu/Debian) or sudo dnf update (RHEL/CentOS).
-
Creating New Users: Use adduser username to set up new accounts with home directories and passwords.
-
Time Zone and Localization: Configure with timedatectl or /etc/localtime.
Configuring SSH for Remote Access
Secure Shell (SSH) enables remote system management:
-
Install SSH server: sudo apt install openssh-server (Ubuntu) or sudo dnf install openssh-server (RHEL).
-
Start and enable SSH: sudo systemctl enable –now sshd.
-
Configure SSH settings in /etc/ssh/sshd_config (e.g., change default port, disable root login).
-
Connect remotely: ssh user@hostname.
Basic Security Practices After Installation
-
Update the system regularly to patch vulnerabilities.
-
Disable unused services (systemctl disable service_name).
-
Configure a firewall (e.g., ufw or firewalld).
-
Set strong passwords and use SSH key-based authentication.
-
Restrict root access and use sudo for administrative tasks.
Explore Related Tech Topics
Chapter 3: User and Group Management
Creating, Modifying, and Deleting User Accounts
Create: sudo adduser username (interactive) or sudo useradd -m username (manual, with home directory).
Modify: sudo usermod -aG groupname username (add to group) or sudo usermod -s /bin/bash username (change shell).
Delete: sudo userdel -r username (removes user and home directory).
Managing User Passwords and Aging Policies
Change password: sudo passwd username.
Set password policies: Edit /etc/login.defs (e.g., PASS_MAX_DAYS 90 for password expiration).
Lock/unlock accounts: sudo passwd -l username (lock), sudo passwd -u username (unlock).
Understanding and Managing Groups
Create group: sudo groupadd groupname.
Add user to group: sudo usermod -aG groupname username.
View groups: groups username or cat /etc/group.
Delete group: sudo groupdel groupname.
Sudo Privileges and Their Importance
The sudo command allows users to execute commands as root or another user:
Add user to sudo group: sudo usermod -aG sudo username (Ubuntu) or sudo usermod -aG wheel username (RHEL).
Configure sudo: Edit /etc/sudoers with visudo for fine-grained control (e.g., restrict commands).
Importance: Enhances security by limiting root access and logging actions.
Best Practices for User and Group Management
Use descriptive usernames and group names.
Regularly audit user accounts (cat /etc/passwd).
Enforce strong password policies.
Limit sudo access to trusted users.
Remove inactive accounts promptly.
Chapter 4: File System Management and Disk Operations
Advanced File Permissions
chmod: Modify permissions numerically (e.g., chmod 644 file) or symbolically (e.g., chmod u+x file).
chown: Change ownership (e.g., chown -R user:group directory for recursive).
umask: Sets default permissions for new files (e.g., umask 022 for rw-r–r–).
Special Permissions: SetUID (chmod u+s), SetGID (chmod g+s), sticky bit (chmod +t).
Managing Disk Space
df -h: Displays disk usage in human-readable format.
du -sh /path: Shows directory size.
Clean-up: Remove unnecessary files or use tools like ncdu for interactive analysis.
Mounting and Unmounting File Systems
Mount: sudo mount /dev/sdX /mnt/point (replace sdX with device name).
Unmount: sudo umount /mnt/point.
Configure permanent mounts in /etc/fstab.
Introduction to Logical Volume Management (LVM)
LVM allows dynamic resizing of file systems:
Create physical volumes: pvcreate /dev/sdX.
Create volume groups: vgcreate vg_name /dev/sdX.
Create logical volumes: lvcreate -L 10G -n lv_name vg_name.
Format and mount: mkfs.ext4 /dev/vg_name/lv_name, then mount.
Backup and Restore Strategies
Use rsync for incremental backups: rsync -av /source /backup.
Create snapshots with LVM for point-in-time recovery.
Automate backups with cron and store off-site (e.g., cloud storage).
Test restores regularly to ensure data integrity.
Chapter 5: Process Management and System Monitoring
Understanding Processes
PID: Unique process ID.
PPID: Parent process ID.
States: Running, sleeping, stopped, zombie.
View processes: ps aux or top.
Managing Processes
Monitor: top or htop (interactive).
Terminate: kill PID (SIGTERM) or kill -9 PID (SIGKILL).
Kill multiple: killall process_name.
Run in background: command & or nohup command &.
Scheduling Tasks with Cron and At
Cron: Schedule recurring tasks in /etc/crontab or crontab -e (e.g., 0 2 * * * /backup.sh for daily at 2 AM).
At: One-time tasks (e.g., echo “command” | at now + 1 hour).
Monitoring System Resources
CPU/Memory: top, htop, free -m.
Disk I/O: iostat, iotop.
Network: iftop, nload.
Use sar (from sysstat) for historical data.
Log File Management and Analysis
System logs: /var/log/syslog (Ubuntu) or /var/log/messages (RHEL).
View logs: journalctl (systemd) or cat /var/log/file.
Configure logging: Edit /etc/rsyslog.conf for custom rules.
Analyze logs: Use grep, awk, or tools like logwatch.
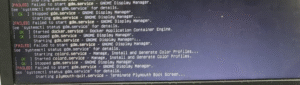
Chapter 6: Network Configuration and Troubleshooting
Understanding Network Interfaces and IP Addressing
Interfaces: Listed with ip link (e.g., eth0, ens33).
IP Addressing: Static (manual) or dynamic (DHCP).
View configuration: ip addr or ifconfig.
Configuring Network Settings
Ubuntu (Netplan): Edit /etc/netplan/*.yaml (e.g., set static IP).
RHEL (nmcli): nmcli con mod “connection-name” ipv4.addresses 192.168.1.100/24.
Apply changes: sudo netplan apply or nmcli con up.
Firewall Management
ufw (Ubuntu): sudo ufw allow 22/tcp (allow SSH), sudo ufw enable.
firewalld (RHEL): sudo firewall-cmd –add-port=80/tcp –permanent.
iptables: Advanced rule-based firewall (e.g., iptables -A INPUT -p tcp –dport 22 -j ACCEPT).
DNS Client Configuration
Edit /etc/resolv.conf or use systemd-resolved.
Set nameservers: nameserver 8.8.8.8.
Basic Network Troubleshooting Tools
ping: Test connectivity (e.g., ping google.com).
traceroute: Trace packet path.
netstat or ss: View network connections.
dig or nslookup: Query DNS.
Chapter 7: Package Management and Software Deployment
Understanding Different Package Managers
-
APT (Debian/Ubuntu): sudo apt install package, sudo apt update.
-
YUM/DNF (RHEL/CentOS): sudo dnf install package, sudo dnf update.
-
Each manager handles dependencies and repositories.
Installing, Updating, and Removing Packages
-
Install: sudo apt install nginx or sudo dnf install nginx.
-
Update: sudo apt upgrade or sudo dnf upgrade.
-
Remove: sudo apt remove package or sudo dnf remove package.
Managing Software Repositories
-
Add repository: Edit /etc/apt/sources.list (Ubuntu) or /etc/yum.repos.d/ (RHEL).
-
Update cache: sudo apt update or sudo dnf makecache.
-
Third-party repos: Use with caution, verify GPG keys.
Compiling Software from Source
-
Download source: wget source.tar.gz.
-
Extract: tar -xzf source.tar.gz.
-
Configure: ./configure, then make, and sudo make install.
-
Pros: Customization; Cons: Manual dependency management.
Introduction to Containerization (Docker)
-
Install Docker: sudo apt install docker.io or sudo dnf install docker.
-
Run a container: docker run -d -p 80:80 nginx.
-
Benefits: Isolation, portability, and scalability.
-
Basic commands: docker ps, docker stop, docker rm.
Read More on These Tech Topics


I don’t think the title of your article matches the content lol. Just kidding, mainly because I had some doubts after reading the article.
Thank you for your sharing. I am worried that I lack creative ideas. It is your article that makes me full of hope. Thank you. But, I have a question, can you help me?
Thanks for sharing. I read many of your blog posts, cool, your blog is very good.
Thanks for sharing. I read many of your blog posts, cool, your blog is very good.
Thanks for sharing. I read many of your blog posts, cool, your blog is very good.
Your article helped me a lot, is there any more related content? Thanks!
Thank you for your sharing. I am worried that I lack creative ideas. It is your article that makes me full of hope. Thank you. But, I have a question, can you help me?
Thanks for sharing. I read many of your blog posts, cool, your blog is very good.
I don’t think the title of your article matches the content lol. Just kidding, mainly because I had some doubts after reading the article.
Thank you for your sharing. I am worried that I lack creative ideas. It is your article that makes me full of hope. Thank you. But, I have a question, can you help me?
Your article helped me a lot, is there any more related content? Thanks!
I don’t think the title of your article matches the content lol. Just kidding, mainly because I had some doubts after reading the article.
Thanks for sharing. I read many of your blog posts, cool, your blog is very good.
Your point of view caught my eye and was very interesting. Thanks. I have a question for you.
Your point of view caught my eye and was very interesting. Thanks. I have a question for you. https://www.binance.com/id/register?ref=UM6SMJM3
I don’t think the title of your article matches the content lol. Just kidding, mainly because I had some doubts after reading the article. https://www.binance.com/register?ref=IXBIAFVY
Can you be more specific about the content of your article? After reading it, I still have some doubts. Hope you can help me. https://www.binance.com/register?ref=QCGZMHR6