Step-by-Step Fix
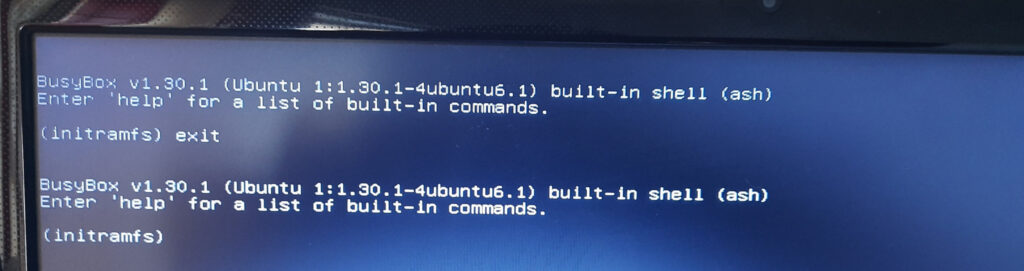
Step 1: Check if Disks Are Detected
At the (initramfs) prompt, run:
Also try:
ls /dev/nvme*

You should see something like /dev/sda, /dev/sda1, /dev/nvme0n1p1, etc.
❌ If nothing is shown, try loading drivers:
Then check again with ls /dev/sd*.
Step 2: Identify Your Root Partition
If disks are listed, run:
You’ll see output like:
If blkid gives no output, try:
Look for a Linux partition (usually ext4 or xfs). Example: /dev/sda1, /dev/nvme0n1p2.
Step 3: Run Filesystem Check (fsck)
Now run:
Replace
/dev/sda1with your partition.

If you get “no such file or directory”, double-check the device name.
If fsck finds and fixes errors, type:
If fsck still fails, try:
This will automatically confirm fixes.
Step 4: Check for LVM or Encrypted Partitions (If Applicable)
If you’re using LVM or encryption:
Then:
Step 5: Check or Fix /etc/fstab (Advanced)
If fsck succeeds, try mounting the root partition:
If the root filesystem is visible:
Check for wrong UUIDs. Get the correct one using:
Compare UUIDs and correct them in /mnt/etc/fstab.
Step 6: Rebuild Initramfs (Optional if root mounts)
If you’re still stuck, try this:
Then reboot:
If Nothing Works – Use Live USB
If the issue cannot be fixed via initramfs, boot into a Ubuntu Live USB:
Step-by-Step:
-
Boot into Ubuntu Live USB
-
Open terminal
Bonus: Reinstall GRUB (If Bootloader Is Corrupted)
In chroot from live USB:
Check Disk Health (Optional but Recommended)
From live USB:
Look for Reallocated Sector Count, Pending Sectors, etc.
Summary
| Step | Task |
|---|---|
| 1️⃣ | Check disk detection: ls /dev/sd* |
| 2️⃣ | Identify partition: blkid or fdisk -l |
| 3️⃣ | Run fsck: fsck -f /dev/sda1 |
| 4️⃣ | For LVM: vgchange -ay, then fsck |
| 5️⃣ | Mount and check /etc/fstab |
| 6️⃣ | Rebuild initramfs: update-initramfs -u |
| 7️⃣ | Use Live USB if needed |
| 8️⃣ | Check disk health: smartctl -a /dev/sda |
| 9️⃣ | Reinstall GRUB if needed |