Introduction
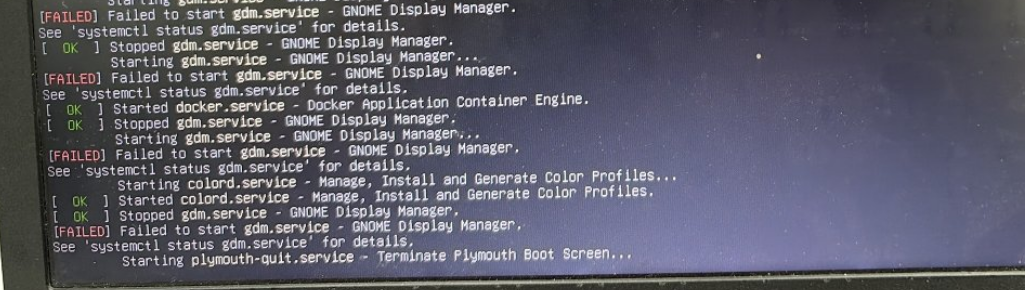
If your Ubuntu suddenly boots to a black screen or text-only console showing:
Failed to start gdm.service – GNOME Display Manager
Don’t worry—your system isn’t broken.
This error means your graphical login (GDM) failed to start—usually because of:
A blocked graphics driver (e.g., Secure Boot + NVIDIA)
Wrong BIOS storage mode (RAID/VMD instead of AHCI)
Corrupted GDM or GPU configuration
This guide explains how to fix it step-by-step on Lenovo, Dell, HP, and other laptops, even if you don’t have a USB flash drive.


Thank you for your sharing. I am worried that I lack creative ideas. It is your article that makes me full of hope. Thank you. But, I have a question, can you help me?
Can you be more specific about the content of your article? After reading it, I still have some doubts. Hope you can help me.
Thank you for your sharing. I am worried that I lack creative ideas. It is your article that makes me full of hope. Thank you. But, I have a question, can you help me? https://www.binance.info/register?ref=IHJUI7TF
Can you be more specific about the content of your article? After reading it, I still have some doubts. Hope you can help me.
Can you be more specific about the content of your article? After reading it, I still have some doubts. Hope you can help me.
Yo, just checked out g555. It’s alright, a decent alternative for sure, It just needs a bit more content, you know to keep the attention going. g555
Can you be more specific about the content of your article? After reading it, I still have some doubts. Hope you can help me.
Your point of view caught my eye and was very interesting. Thanks. I have a question for you.
Can you be more specific about the content of your article? After reading it, I still have some doubts. Hope you can help me.
I don’t think the title of your article matches the content lol. Just kidding, mainly because I had some doubts after reading the article.
Can you be more specific about the content of your article? After reading it, I still have some doubts. Hope you can help me.
Thank you for your sharing. I am worried that I lack creative ideas. It is your article that makes me full of hope. Thank you. But, I have a question, can you help me?
I don’t think the title of your article matches the content lol. Just kidding, mainly because I had some doubts after reading the article.
hello world
hello world
I don’t think the title of your article matches the content lol. Just kidding, mainly because I had some doubts after reading the article. https://accounts.binance.com/register-person?ref=IHJUI7TF
antibiotics online prescription
antibiotics online prescription
Thanks for sharing. I read many of your blog posts, cool, your blog is very good.
diflucan generic cost without insurance
diflucan generic cost without insurance
Thanks for sharing. I read many of your blog posts, cool, your blog is very good.
Lode88info seems to be a landing page for Lode88. Straightforward enough, if you’re after that specific thing anyway. Check it out here: lode88info
Hey guys, just tried bdbb222 – pretty slick site! Good selection of games and the interface is smooth. Worth checking out! Find it here: bdbb222
Alright folks, quick shoutout to bh88. Nice design, easy to navigate, and some interesting promotions happening. Definitely worth a look if you’re looking for something new: bh88
Can you be more specific about the content of your article? After reading it, I still have some doubts. Hope you can help me.
Your point of view caught my eye and was very interesting. Thanks. I have a question for you.
diflucan for yeast
diflucan for yeast
Thanks for sharing. I read many of your blog posts, cool, your blog is very good.