Symptoms of the Error
- Sudden system crashes with a BSOD displaying “FAULTY_HARDWARE_CORRUPTED_PAGE.”
- Random freezes, slowdowns, or application crashes before the BSOD.
- Error codes in Event Viewer related to memory or hardware.
- Potential data loss or corrupted files.
Step-by-Step Guide to Fix the “FAULTY_HARDWARE_CORRUPTED_PAGE” Error
To resolve this error, you’ll need to systematically diagnose and address potential hardware and software issues. Follow these steps in order, testing after each to see if the issue is resolved.
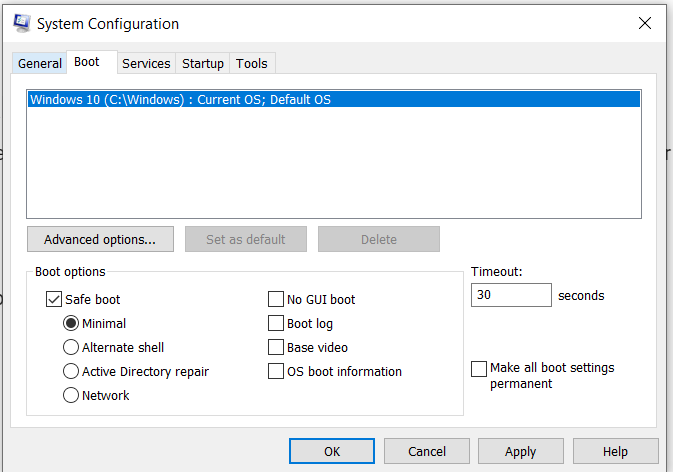
Step 1: Boot into Safe Mode
Safe Mode loads Windows with minimal drivers and services, which can help determine if the issue is software-related.
- Restart in Safe Mode:
- Press Windows + R, type msconfig, and press Enter.
- Go to the Boot tab, check Safe boot (select Minimal), and click OK.
- Restart your computer.
- Alternatively, if you can’t boot normally:
- Restart your PC and press F8 or Shift + F8 (depending on your system) to access the Advanced Boot Options.
- Select Safe Mode or Safe Mode with Networking.
- Check if the error persists:
- If the BSOD doesn’t occur in Safe Mode, the issue is likely driver- or software-related. Proceed to the software-related steps below.
Step 2: Update Windows and Drivers
Outdated or corrupted drivers are a common cause of this error.
- Update Windows:
- Go to Settings > Update & Security > Windows Update.
- Click Check for updates and install any available updates.
- Restart your computer after updates are applied.

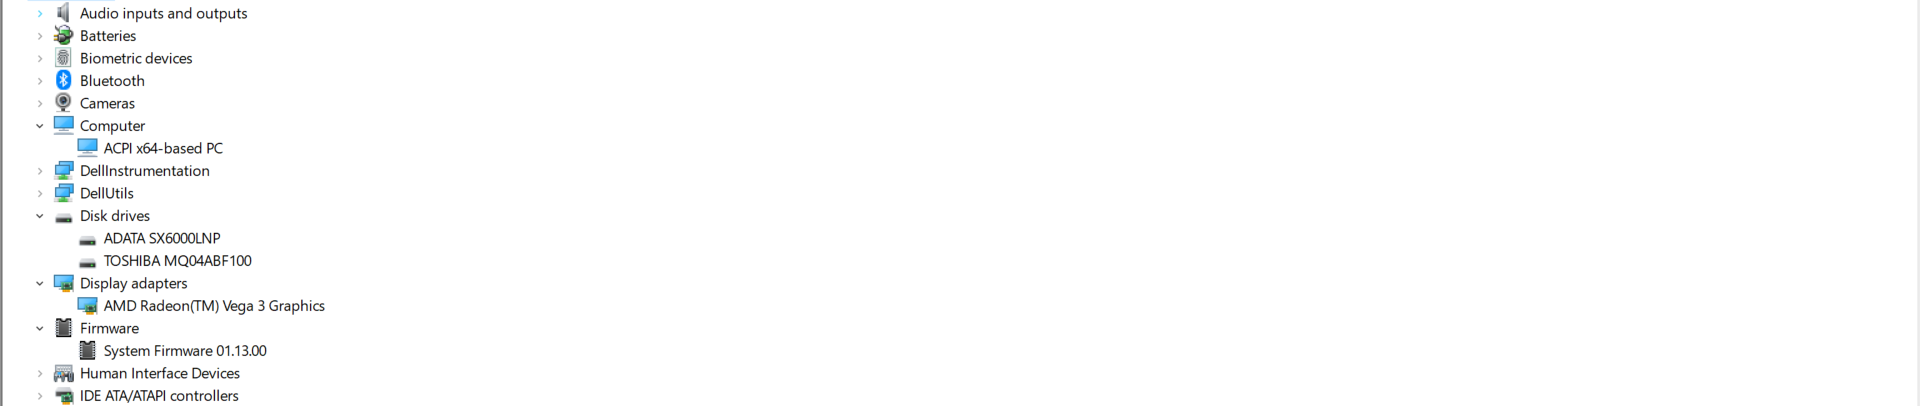
- Update Device Drivers:
- Open Device Manager (Press Windows + X and select Device Manager).
- Look for devices with a yellow exclamation mark.
- Right-click on critical components (e.g., Display adapters, Disk drives, Memory technology devices) and select Update driver > Search automatically for drivers.
- Alternatively, visit the manufacturer’s website (e.g., NVIDIA, AMD, Intel, or your motherboard vendor) to download and install the latest drivers manually.
- Roll Back Recent Driver Updates (if the error started after a driver update):
- In Device Manager, right-click the suspected device, select Properties > Driver tab > Roll Back Driver (if available).
- In Device Manager, right-click the suspected device, select Properties > Driver tab > Roll Back Driver (if available).
Step 3: Run Windows Memory Diagnostic
This tool checks for RAM-related issues, a common cause of this error.
- Open Windows Memory Diagnostic:
- Press Windows + R, type mdsched.exe, and press Enter.
- Choose Restart now and check for problems.
- Run the Test:
- Your PC will restart, and the Memory Diagnostic Tool will run automatically.
- It may take several minutes to complete. The tool will check for errors in your RAM.
- Review Results:
- After the test, Windows will restart, and results will be displayed in the notification area.
- If errors are detected, proceed to Step 7 (Test and Replace RAM).
Step 4: Check Disk for Errors
A corrupted or failing storage device can cause this error.
- Run CHKDSK:
- Open Command Prompt as Administrator (Press Windows + X > Command Prompt (Admin)).
- Type chkdsk /f /r and press Enter.
- If prompted, schedule the scan for the next restart and reboot your PC.
- This command checks for and fixes file system errors and bad sectors.
- Check Drive Health:
- Download a tool like CrystalDiskInfo to check the health of your HDD or SSD.
- If the drive shows “Caution” or “Bad,” back up your data immediately and consider replacing the drive.
Step 5: Scan for Malware
Malware can corrupt memory or interfere with system processes.
- Run Windows Defender:
- Go to Settings > Update & Security > Windows Security > Virus & threat protection.
- Click Quick scan or Full scan to check for malware.
- Use a Third-Party Antivirus (optional):
- Download and run a reputable antivirus like Malwarebytes or Kaspersky to perform a deep scan.
- Remove any detected threats and restart your PC.
Step 6: Check and Repair System Files
Corrupted system files can cause this error.
- Run System File Checker (SFC):
- Open Command Prompt as Administrator.
- Type sfc /scannow and press Enter.
- Wait for the scan to complete. It will repair any corrupted system files.
- Run DISM (if SFC doesn’t resolve the issue):
- In the same Command Prompt, type:DISM /Online /Cleanup-Image /RestoreHealth
- This restores the Windows image and fixes component store corruption.
- Restart your PC after the process completes.
- In the same Command Prompt, type:
Step 7: Test and Replace RAM (if Necessary)
If the Memory Diagnostic Tool detected errors or the issue persists, test your RAM modules.
- Use MemTest86:
- Download MemTest86 (free) from its official website and create a bootable USB.
- Boot your PC from the USB and run the test (this may take hours).
- If errors are found, your RAM is likely faulty.
- Reseat or Replace RAM:
- Power off your PC, unplug it, and open the case.
- Remove and reseat the RAM modules firmly in their slots.
- If you have multiple RAM sticks, test each one individually in different slots.
- If errors persist, replace the faulty RAM module(s).
Step 8: Check for Overheating
Overheating can cause hardware errors leading to this BSOD.
- Monitor Temperatures:
- Use a tool like HWMonitor or Core Temp to check CPU, GPU, and RAM temperatures.
- Normal temperatures under load:
- CPU: Below 85°C
- GPU: Below 90°C
- RAM: Below 60°C
- Improve Cooling:
- Clean dust from fans, heatsinks, and vents using compressed air.
- Ensure proper airflow in your PC case.
- Reapply thermal paste to the CPU if temperatures are consistently high.
Step 9: Update BIOS/UEFI (Advanced)
An outdated BIOS can cause hardware compatibility issues.
- Check BIOS Version:
- Press Windows + R, type msinfo32, and press Enter.
- Look for BIOS Version/Date in the System Information window.
- Update BIOS:
- Visit your motherboard manufacturer’s website and download the latest BIOS update.
- Follow the manufacturer’s instructions to update the BIOS (usually via a USB drive).
- Caution: Incorrect BIOS updates can brick your motherboard, so follow instructions carefully.
Step 10: Perform a Clean Boot
A clean boot helps identify if third-party software is causing the issue.
- Open System Configuration:
- Press Windows + R, type msconfig, and press Enter.
- Go to the Services tab, check Hide all Microsoft services, and click Disable all.
- Go to the Startup tab and click Open Task Manager.
- Disable all startup items.
- Restart and Test:
- Restart your PC and check if the BSOD occurs.
- If the issue is resolved, re-enable services and startup items one by one to identify the culprit.
Step 11: Reset or Reinstall Windows
If none of the above steps work, a corrupted Windows installation may be the issue.
- Reset Windows:
- Go to Settings > Update & Security > Recovery.
- Select Reset this PC and choose Keep my files or Remove everything.
- Follow the prompts to reset Windows.
- Reinstall Windows (if reset doesn’t work):
- Create a bootable Windows USB using the Windows Media Creation Tool from Microsoft’s website.
- Boot from the USB and follow the instructions to perform a clean installation.
- Back up all important data before proceeding.
Step 12: Test Other Hardware Components
If the issue persists, other hardware components (e.g., CPU, GPU, or motherboard) may be faulty.
- Test GPU:
- Use tools like FurMark to stress-test your GPU.
- If errors occur, try reseating the GPU or testing with a different one.
- Test CPU:
- Use Prime95 to stress-test your CPU.
- If errors occur, the CPU may need replacement (consult a professional).
- Consult a Professional:
- If you suspect a faulty motherboard or other components, take your PC to a certified technician for diagnosis.
Preventing Future Errors
- Regular Maintenance: Keep drivers, Windows, and BIOS updated.
- Monitor Hardware Health: Use tools like CrystalDiskInfo and HWMonitor regularly.
- Backup Data: Regularly back up important files to avoid data loss.
- Avoid Overclocking: Unless you’re experienced, avoid overclocking RAM, CPU, or GPU.
- Use Reliable Power Supply: Ensure your PSU is adequate for your system’s needs.
Additional Notes
- If the BSOD persists after trying all steps, it’s likely a hardware issue requiring professional repair or replacement.
- Always back up critical data before performing major troubleshooting steps like reinstalling Windows or replacing hardware.
- If you need to analyze the BSOD dump file for more details:
- Use a tool like BlueScreenView to read the minidump files (located in C:\Windows\Minidump).
- This can help identify the specific driver or hardware causing the issue.
If you have specific details about when the error occurs (e.g., during gaming, startup, or specific tasks), let Quester, please share them, and I can tailor the advice further!