
Are you facing an issue where your Android Studio emulator starts but doesn’t show any graphical interface (GUI)—yet it works perfectly when launched from the command line?
If you’re using a low-end laptop or PC without a dedicated GPU, you’re not alone. This issue is surprisingly common, especially on systems lacking proper graphics acceleration.
In this blog, we’ll explore why this happens and, most importantly, how to fix it step by step.
Why the Emulator GUI Fails on Low-End PCs
The Android Emulator is designed to use hardware acceleration (GPU) by default to render the virtual device’s screen. This approach works well on modern systems with dedicated or integrated GPUs. However, on low-end PCs without GPU support, this causes:
-
The emulator launches but does not show any window (GUI)
-
A black or blank window that immediately disappears
-
No response when started from Android Studio
Yet strangely, it works fine when started from a command line using software rendering.
Step-by-Step Fix: Make Emulator Work Without GPU
Let’s walk through how to fix the problem and get the emulator GUI working on your low-spec system.
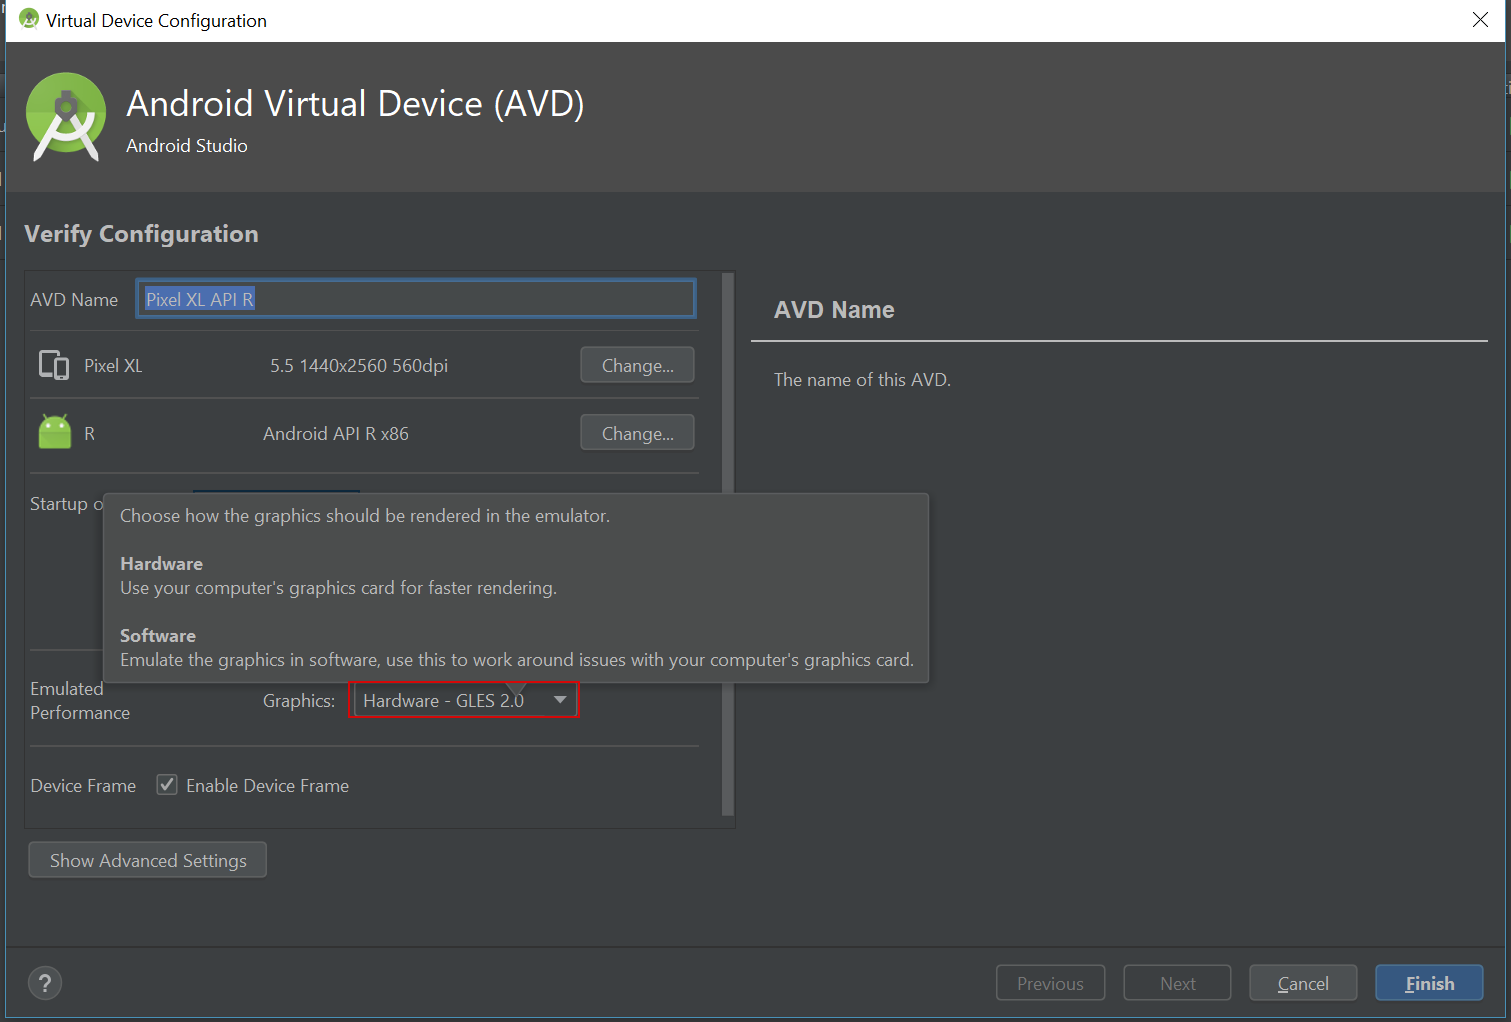
Step 1: Force Software Rendering in AVD Settings
-
Open Android Studio
-
Go to Tools > Device Manager.
-
Click the pencil icon to edit the emulator (AVD)
-
Scroll to Emulated Performance → Graphics
-
Change the setting from
AutomaticorHardwaretoSoftware -
Click Finish and try starting the emulator again
Step 2: Manually Edit Emulator Config File
If the GUI still doesn’t show, modify the emulator config directly:
-
Navigate to:
php-templateC:\Users\<YourUsername>\.android\avd\<Your_AVD_Name>.avd\config.ini -
Open
config.iniin a text editor (like Notepad) -
Ensure these lines are present
hw.gpu.mode=swiftshader_indirecthw.gpu.enabled=yesIf it still fails, try:
hw.gpu.enabled=no -
Save the file and restart the emulator
Step 3: Disable Embedded Emulator in Android Studio
Some low-end systems have issues rendering the emulator inside the Android Studio window.
-
Go to File > Settings > Tools > Emulator
-
Uncheck the box labeled “Launch in a tool window.”
-
Restart Android Studio
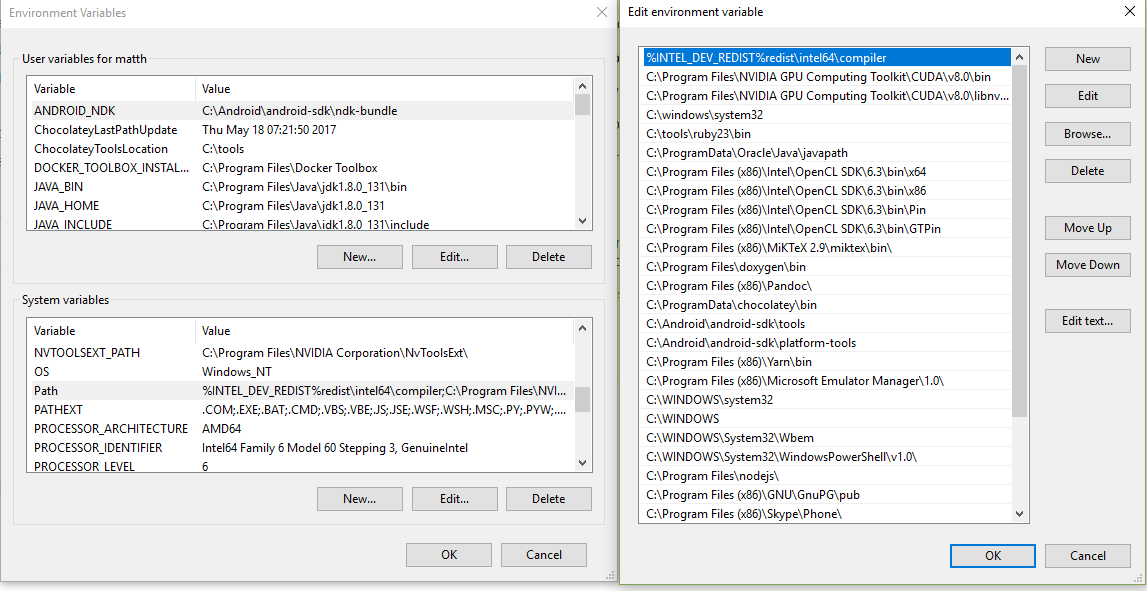
Step 4: Set Environment Variables in Windows (Force Software Rendering)
If your system has no GPU or struggles with OpenGL, setting environment variables helps force software rendering for the emulator.
How to Set Environment Variables on Windows
-
Press
Win + R, type**sysdm.cpl**, and press Enter -
Go to the Advanced tab → Click Environment Variables
-
Under System variables, click New:
-
Variable name:
QT_OPENGL
Variable value:software
👉 This forces the emulator to use software-based OpenGL rendering.
-
-
(Optional) Add this too if AVD has trouble finding the SDK path:
-
Variable name:
ANDROID_SDK_ROOT
Variable value:C:\Users\<YourUsername>\AppData\Local\Android\Sdk
-
-
Click OK → Restart your PC
Step 5: Run Emulator with Software GPU via Command
If you need a reliable manual way to launch the emulator with GUI, use this command:
emulator -avd <your_avd_name> -gpu swiftshader_indirect
If that doesn’t work, try:
emulator -avd <your_avd_name> -gpu off
Optional: Create Desktop Shortcut (Batch File)
To simplify the launch process, create a .bat file on your desktop:
@echo off
cd "C:\Users\<YourUsername>\AppData\Local\Android\Sdk\emulator"
emulator.exe -avd <your_avd_name> -gpu swiftshader_indirect
Simply double-click this shortcut to launch the emulator with the GUI at any time.
Additional Tips
-
Keep your SDK and emulator images updated
-
Avoid high-resolution devices or Google Play images on low-end hardware
-
Try using x86_64 system images (not ARM) for better performance
✅ Conclusion
The Android Emulator not displaying a GUI in Android Studio is usually caused by incompatible GPU rendering on low-end systems. Thankfully, switching to software rendering solves the issue in most cases.
By following the steps above, you should be able to run the emulator with a GUI smoothly, even without a GPU.